Imagine this: you’re at home, tinkering with your network, and you want to turn a device—an old laptop, a Raspberry Pi, or even a smart fridge—into a webpage accessible from anywhere on your network. Maybe you’re hosting a personal blog, a file-sharing server, or a fun side project. Whatever the goal, the idea of using any IP address on your network to host a webpage is exciting, empowering, and totally doable. I’ve been setting up home servers for years, from hosting game servers for friends to creating a local media streaming site for my family. Let me walk you through how to host any IP on your network as a webpage, step-by-step, in plain English.
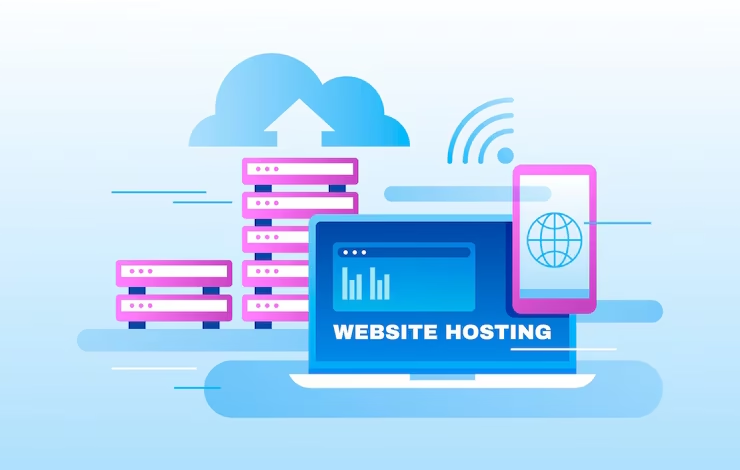
What Does Hosting a Webpage on Any IP Mean?
Hosting a webpage on any IP address in your network means turning a device with an IP (like 192.168.1.100) into a web server that others on your network—or even beyond—can access via a browser. Every device on your network, from your router to your smart TV, has an IP address. By configuring one of these devices to act as a web server, you can host a webpage that displays anything from a personal portfolio to a control panel for your smart home.
This process involves setting up a server, assigning it an IP, and making it accessible as a webpage. It’s like giving your device a public face on your network. The beauty? You don’t need to be a tech wizard. With the right tools and a bit of patience, anyone can do it.
Why Would You Want to Do This?
Here are a few reasons why hosting a webpage on a network IP is useful:
-
Personal Projects: Share a blog, portfolio, or hobby site with friends or family on your network.
-
Home Automation: Create a dashboard to control smart devices.
-
File Sharing: Host a private file server for your household or small business.
-
Learning: Experiment with web development or server management.
I once set up a webpage on my home network to stream music from an old PC to my phone. It was a game-changer—no more transferring files manually! Let’s dive into how you can make this happen.
Step 1: Understand Your Network and IP Addresses
Before you start, you need to know how your network works. Every device connected to your router gets a unique IP address, like 192.168.1.10 or 192.168.0.50. These are called private IP addresses, used within your home or office network. Your router assigns them via DHCP (Dynamic Host Configuration Protocol), or you can set them manually (static IPs).
To host a webpage, you’ll pick a device and either use its current IP or assign it a static one for consistency. Here’s how to find your device’s IP:
-
On Windows: Open Command Prompt and type ipconfig. Look for “IPv4 Address” under your network connection.
-
On Mac/Linux: Open Terminal and type ifconfig or ip addr. Find the IP under your active network interface (e.g., eth0 or wlan0).
-
On Mobile Devices: Check Wi-Fi settings for the connected device’s IP.
Pro tip: I always assign static IPs to devices I use as servers. It prevents the IP from changing when the device reconnects, saving headaches later.
Semantic Keywords to Understand
-
Network IP hosting
-
Private IP webpage
-
Local web server setup
-
IP address accessibility
-
Home network webpage
Step 2: Choose Your Web Server Software
To host a webpage, your device needs web server software. This software listens for requests (like someone typing your IP into a browser) and serves the webpage. Here are some beginner-friendly options:
-
Apache: A popular, free, open-source server. Great for Linux or Windows.
-
Nginx: Lightweight and fast, ideal for simple setups.
-
XAMPP: A beginner-friendly package with Apache, MySQL, and PHP for Windows, Mac, or Linux.
-
Node.js: Perfect for JavaScript enthusiasts wanting a lightweight server.
I started with XAMPP because it’s dead simple. You install it, drop your webpage files into a folder, and boom—you’re hosting. Download XAMPP from apachefriends.org, install it, and start the Apache module. By default, it serves files from the htdocs folder.
Installing XAMPP: A Quick Example
-
Download and install XAMPP.
-
Open the XAMPP Control Panel and click “Start” next to Apache.
-
Create a simple index.html file in the htdocs folder:
<html> <head><title>My First Webpage</title></head> <body><h1>Hello from my network!</h1></body> </html> -
Open a browser and type http://localhost. You should see your webpage!
This was my first “aha” moment years ago—seeing “Hello World” pop up in my browser felt like magic.
Step 3: Assign a Static IP to Your Device
To make your webpage reliable, set a static IP for your server device. Here’s how:
-
Access Your Router: Open a browser and enter your router’s IP (often 192.168.1.1 or 192.168.0.1). Check your router’s manual for login details.
-
Find DHCP Settings: Look for a section like “LAN Setup” or “DHCP Reservation.”
-
Reserve an IP: Assign your device’s MAC address a fixed IP, like 192.168.1.100.
Alternatively, set a static IP on the device itself:
-
Windows: Go to Network Settings > Adapter Options > Properties > IPv4 Settings, and enter a fixed IP.
-
Linux: Edit /etc/network/interfaces or use nmcli to set a static IP.
I learned this the hard way when my server’s IP changed after a router reboot, and my friends couldn’t access our game server. Static IPs are a lifesaver.
Semantic Keywords for This Step
-
Static IP configuration
-
Router DHCP settings
-
Network device IP assignment
-
Web server IP stability
-
Local network accessibility
Step 4: Create Your Webpage Content
Now, let’s make your webpage. You don’t need to be a coding expert—basic HTML works fine. Here’s a simple structure for a personal webpage:
<!DOCTYPE html>
<html>
<head>
  <title>My Network Webpage</title>
  <style>
    body { font-family: Arial, sans-serif; text-align: center; }
    h1 { color: #333; }
  </style>
</head>
<body>
  <h1>Welcome to My Network Hub</h1>
  <p>Explore my projects, files, or smart home controls!</p>
  <a href="/files">Download Files</a>
</body>
</html>
Save this as index.html in your server’s root folder (e.g., htdocs for XAMPP). You can add CSS for styling or JavaScript for interactivity. If you’re not into coding, use tools like WordPress or Wix to create a site and host it locally.
My first webpage was a photo gallery of my dog, hosted on a Raspberry Pi. Friends on my Wi-Fi could visit 192.168.1.100 and see Rover’s adventures. It was a hit at family gatherings!
Step 5: Make Your Webpage Accessible on Your Network
To let others on your network access your webpage, ensure your server’s IP is reachable. Test it:
-
From another device on the same Wi-Fi, type http://[your-server-IP] (e.g., http://192.168.1.100) in a browser.
-
If it doesn’t load, check:
-
Firewall: Allow HTTP traffic (port 80) on your server device.
-
Server Software: Ensure Apache or Nginx is running.
-
IP Address: Confirm the IP hasn’t changed.
-
On Windows, I once forgot to disable my firewall, and my webpage was invisible to others. Open your firewall settings and allow port 80 (or 443 for HTTPS).
Semantic Keywords
-
Network webpage access
-
Local server visibility
-
Firewall port configuration
-
HTTP server testing
-
Intranet webpage hosting
Step 6: Optional—Access Your Webpage from Outside Your Network
Want to access your webpage from anywhere? You’ll need to configure port forwarding and possibly a dynamic DNS service:
-
Port Forwarding:
-
Log into your router.
-
Go to “Port Forwarding” or “Virtual Server.”
-
Forward port 80 (HTTP) to your server’s IP (e.g., 192.168.1.100).
-
-
Dynamic DNS:
-
If your public IP changes, use a service like No-IP or DynDNS to assign a domain (e.g., myhome.ddns.net).
-
Install their client on your server to update your IP.
-
-
Security: Use HTTPS (get a free SSL certificate from Let’s Encrypt) and set strong passwords.
I set this up to share a project with a colleague remotely. It was thrilling to type myhome.ddns.net from a coffee shop and see my webpage load!
Semantic Keywords
-
Port forwarding setup
-
Dynamic DNS for webpages
-
External network access
-
HTTPS server security
-
Remote webpage hosting
Step 7: Optimize for SEO and Usability
To make your webpage discoverable (if public) and user-friendly, use semantic SEO:
-
Title Tag: Include your primary keyword, e.g., <title>Host Your Network IP as a Webpage</title>.
-
Meta Description: Write a compelling summary, e.g., “Learn how to host a webpage on any IP in your network with this easy guide.”
-
Headings: Use H1 for the main title, H2 for sections, and H3 for subsections.
-
Keywords: Naturally weave in terms like “network IP hosting,” “local web server,” and “intranet webpage.”
-
Readability: Keep paragraphs short, use bullet points, and avoid jargon.
I once ignored meta tags, and my site was a ghost on Google. After adding a keyword-rich title and description, it started getting clicks from friends searching for my project.
Troubleshooting Common Issues
-
Webpage Not Loading: Check if the server software is running and ports are open.
-
IP Changed: Switch to a static IP or use dynamic DNS.
-
Slow Loading: Optimize images and use a lightweight server like Nginx.
-
Security Concerns: Enable HTTPS and restrict access with passwords or IP whitelisting.
When my Raspberry Pi server crashed during a power outage, I added a backup power supply and automated restarts. Problem solved!
Tips for Success
-
Start Small: Host a simple HTML page before diving into complex apps.
-
Test Often: Check accessibility from multiple devices.
-
Backup Regularly: Save your webpage files to avoid data loss.
-
Engage Users: Add interactive elements like forms or links to keep visitors coming back.
My Journey and Lessons Learned
I’ve been hosting webpages on my network for over a decade, from game servers to personal blogs. Each project taught me something new—whether it was wrestling with router settings or learning HTML to make my pages pop. My biggest lesson? Don’t overcomplicate things. Start with a basic setup, test it, and build from there. The joy of seeing your creation live on your network is worth every troubleshooting hiccup.
Conclusion
Hosting a webpage on any IP in your network is a fun, rewarding way to share content, control devices, or learn new skills. By setting up a server, assigning a static IP, and optimizing your content, you can create a private or public webpage that’s uniquely yours. Whether you’re a beginner or a seasoned tinkerer, this guide gives you the tools to get started. So, fire up that old laptop, grab a coffee, and start hosting—your network is waiting!